- On
- 10 Jul 2022
- Reading time
- 3 minutes
You must consider certain factors when choosing between a built-in microwave or a countertop microwave. The first one is space, then budget. A built-in microwave will fit into a cabinet, saving valuable counter space (just like an integrated microwave). However, they require a higher budget when you factor the installation cost into the equation.
Many people opt for technicians, but you can install it yourself (probably with a couple of friends) to save cost if you are handy enough. Can't do it yourself? Read online shop reviews to find stores that offer installation as an after sale service.
This article will give a step-by-step process for people who plan to install it themselves.
First things first, tools!
Tools Needed to Install a Built-in Microwave
Phillips screwdriver
Flat-blade screwdriver
Level
Measuring tape
Drill
Drill bits (3mm and 2.5cm).
Check out UK electronic store reviews to find the outlets that sell these tools if you don't already own them.
Steps to Installing a Built-in Microwave
Step 1: Measure the Cabinet
Measuring the cabinet opening is critical because the microwave must neatly fit into the space. Buying a microwave that juts out because it is bigger than the cabinet space defeats the purpose of a built-in appliance. Measure the height, length, width, and depth of the cabinet. Add a 3-inch and 1-inch clearance above and below the cabinet opening for good measure. Not sure where to shop? Online stores like Daewoo deal in electronic appliances.
Step 2: Check Electrical Supply
The microwave functions with electricity, so you must ensure you place it near an electrical outlet. Most microwaves demand an electrical supply rated 240V at 60Hz or a 20amp circuit. If you don't have this, you can contact an electrician to fix it. You can buy an extension cord from online electronic stores like PowerDirect if the electrical outlet is too far from the cabinet.
Step 3: Install the Spacer Kit
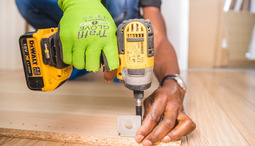
Now to some action. Built-in microwaves come with a spacer kit, and you must first assemble them. Align and screw one of the spacer bars to the bottom trim, and repeat for the opposite spacer bar. Next, place the spacer kit assembly against the lower edge of the cabinet opening, and drill a hole through the spacer bars. Then use the screwdriver to tighten flathead screws through the holes to fasten the assembly.
Step 4: Mount the Microwave on a Countertop
If your friends haven't already joined in on the act, now is a perfect time. Microwaves are heavy to lift. Even if it is a small microwave, ask your friends to help you gently lift the microwave onto the counter to eliminate any risk of injury. Unpack the microwave and remove every piece of accessory, packaging materials, and glass tray from the microwave.
Step 5: Connect the Wires
Most built-in microwaves only need to be plugged into the extension cord or power outlet at this point. Some may require an extra electrical manoeuvre, but it should be easy to complete if you have already come this far. First, turn off the fuse box, and secure the wires to the junction box.
Step 6: Fit In and Finish
Ask your friends to help you install the microwave into the cabinet opening. Ensure that the microwave oven aligns with the spacer bars before fixing it to the mounting bracket. Now, gently arrange the tray, glass, and other accessories. You can now use the built-in microwave — for starters, make some popcorn for your friends to reward them for their help.
Final Words
Built-in microwaves give your kitchen a modern sleekness — picture a built-in black microwave in a kitchen with dark marbles! One of the downsides of a built-in microwave is the additional cost incurred for installation. But if you can install it yourself, you would have circumvented that issue. Check out electronic stores like Robert Dyas for the built-in microwave of choice, and get your gloves up.


